
You’re offline. This is a read only version of the page.


To update the software on your AirCheck G2, you must have a valid AllyCare support contract on your unit. To prevent problems caused by losing power during a software update, supply power to the AirCheck G2 with the AC adapter.
Software Downloads:
https://link-live.com/downloads
Software Update:
You can update the software one of three ways.
1. Automatic update from the AirCheck G2
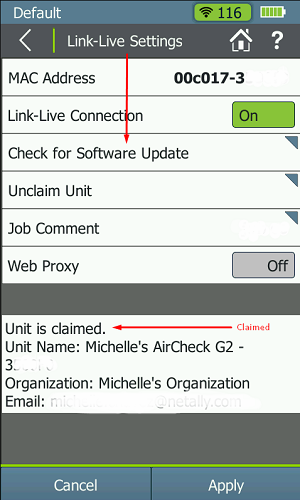
To update the software directly from your unit, it must be on version 3.0 or later and it must be claimed in Link-Live.
2. USB Drive
To update the software from a USB drive:
3. AirCheck G2 Manager Software
To update the software from your local PC or laptop, you must first download and install the AirCheck G2 manager software. For compatible versions of Windows please see the following article: AirCheck G2: Manager Software on Windows.
1. Download the software. You might need to unzip the file to obtain the .ACFX file.
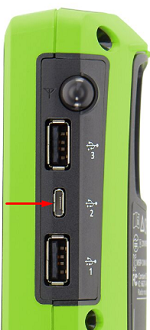
2. Connect your AirCheck G2 via micro-usb cable to the computer. Note: Make sure you connect the micro-usb cable into the middle port on the right side on the AirCheck G2. Do not use any other USB port as it will not work.
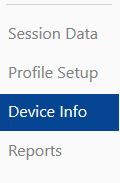
3. Launch the AirCheck G2 manager software and click Device Info on the left.
4. Click Update AirCheck G2 Firmware...
5. Browse for the .ACFX file and follow the on-screen directions.