
You’re offline. This is a read only version of the page.


1. Open Bing Maps or Google Maps and enter a location or address for the outdoor Survey, zooming in appropriately. Once you have the map view as you like it, use a snipping tool to create a .png (or .jpg) file of the area.
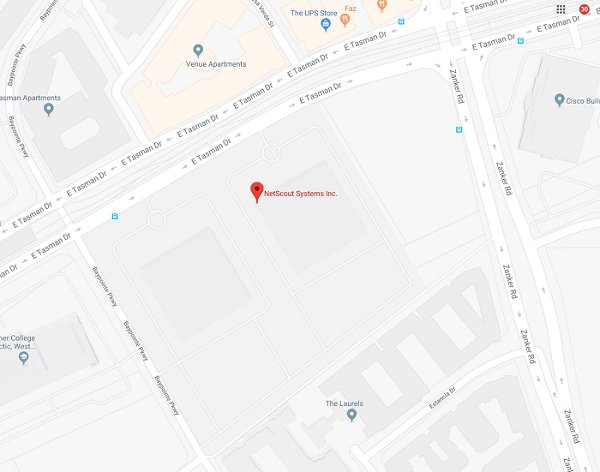
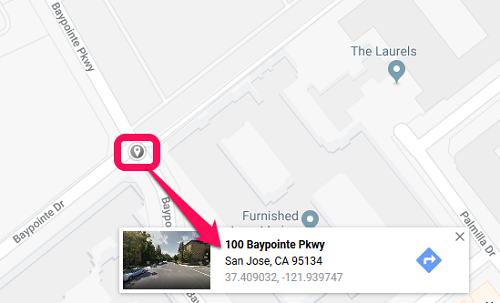
2. Before closing Google or Bing, note one of your coordinates by sticking a pin in the map. Take a screenshot of the this pin and its coordinates so that later you can calibrate the map (or, if your memory is great, just note the location and coordinates of this pin). In this example, we have stuck a pin at the intersection of Baypointe Parkway and Baypointe Drive and noted the coordinates. Now, go diagonally across the map and stick another pin in the map. The second example shows a pin at the intersection of Zanker Rd and E Tasman Dr. Take a screenshot for later or note the location and coordinates of the pin.
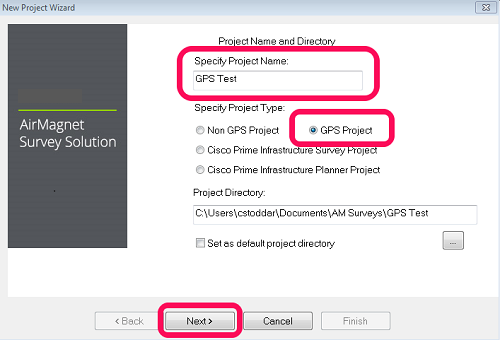
3. Open Survey and create new GPS Survey project [File > New Project]. Click Next,
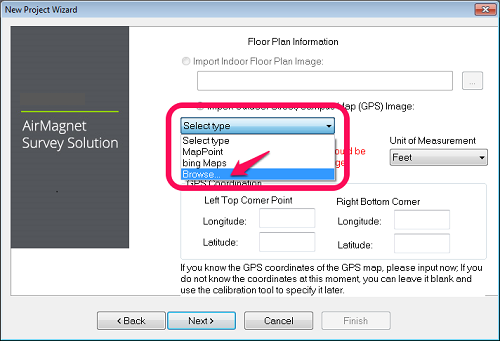
4. To import the Outdoor Street/Campus Map Image, select the Browse option; choose the image file you created earlier. Do not enter any coordinates here. Click Next,
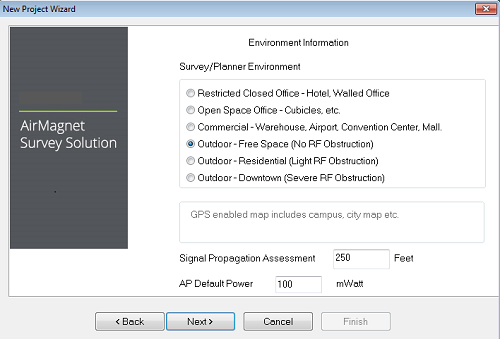
5. Select the appropriate environment option, click Next and then Finish.
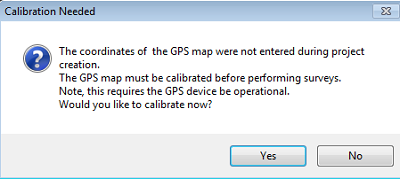
6. When prompted to calibrate the project, click Yes and then OK.
7. Zoom in appropriately and then click on a location on the map that matches one of the coordinates you chose earlier. A warning message will be displayed; click OK.

8. A GPS Calibration window will display. Click the map where you took your first coordinate point earlier, when you took a screenshot of your map. Here we see that our pin for the first coordinate is placed at the same location we placed it on the map earlier.
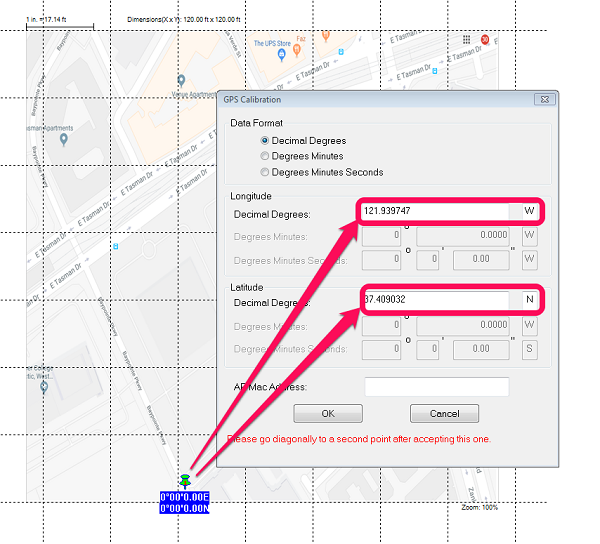
Enter the Longitude; enter W for West (or a positive number) or E for East (a negative number).
Enter the Latitude; enter N for North (or a positive number) or S for South (a negative number).
Click OK to place the second pin and enter the coordinates for that second location that you noted earlier.
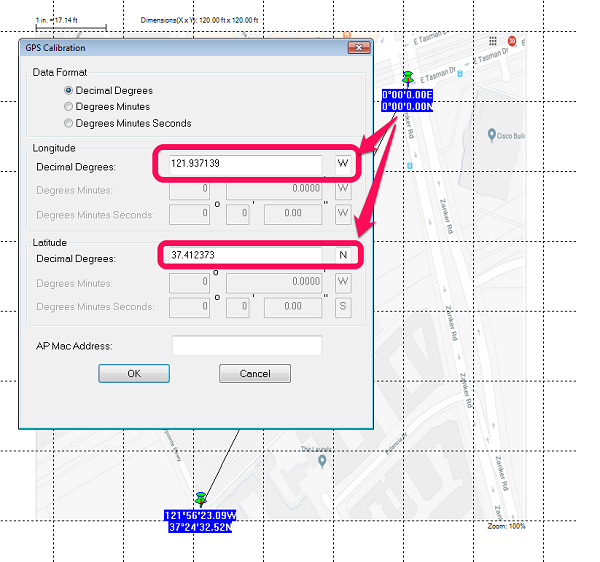
NOTE: Please enter these coordinates with precision. The GPS will be using these coordinates to correctly track your survey path. If a mistake is made prior to surveying, simply right-click the map in the Display page and choose GPS Calibrate to re-calibrate the GPS coordinates.
Click OK when finished.
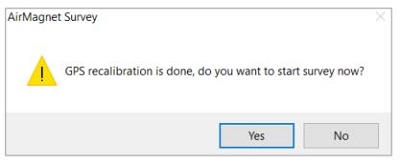
9. After GPS calibration is complete, the following message will be displayed:
10. Whether you choose to start the survey now or not, you will see the correctly calibrated image. If it appears smooshed or skewed, you will need to re-calibrate by right-clicking the map and selecting GPS Calibrate.
